Our content features commercial links to our products, committed to transparent, unbiased, and informed editorial recommendations. Learn More
Sharpening a Sword Guide Through 6 Simple Steps
NO AI USED This Article has been written and edited by our team with no help of the AI
For some people, swords aren’t only meant to be placed on walls and act as decorative pieces. Instead, they must be sharpened and regularly checked for battle readiness and top-notch performance.
This article will discuss sword sharpening and explain everything you need to know. First, we’ll talk about what you need before sharpening a sword. Then you’ll learn how to sharpen your sword, when to do it, and some other very useful techniques and methods.
What You Need Before You Begin Sword Sharpening
A couple of things must be at your disposal before you start sharpening your sword, or even if you do some knife sharpening.
Whetstone
Sharpening stones, also called whetstones, are used to grind and polish the edges of steel tools like swords. There are many different shapes, sizes, and types of these stones. They can be flat to work on flat edges or shaped to work on more complicated edges.
There are different grit levels for whetstones, from very coarse (200 and below) to very fine (8000). For sharpening swords, a grit of 1000 to 1500, which is in the middle, should be enough.
Oil for the Whetstone
Mineral oil is good for sharpening because it is light and doesn’t get hard or smell bad. Light oil is best because a heavy or thick oil will prevent the stone from doing its job. Honing oil is specifically made for working with steel tools. You can get these oils at most places that offer sports gear and guns.
Even though it may be tempting to use vegetable oil, we strongly recommend you to refrain from using this easy-to-find option.
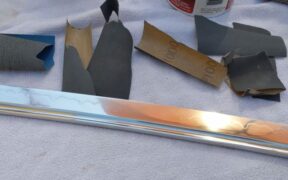
3M 400 Grit Emery Cloth
The 3M Emery Cloth is made for sanding metal that needs to last, like getting rid of rust and corrosion. This makes it perfect when sharpening your sword. This type of cloth also won’t shred or tear your high-quality stainless steel.
Metal File
A metal file can take off small amounts of the metal from a blunt and disfigured sword. It is a very common way to work with wood, metal, and other similar materials. It is convenient and much needed when sharpening your sword.
Block of Wood
Any surface will suffice to hold the sword on, but wood does the job just fine. Usually, you will rest the edge of the blade on one side of the wood. This way, you won’t damage the blade while scraping or sharpening it.
How to Sharpen a Sword
There are six most basic steps to sharpen your sword. If you are a beginner, we highly advise you to take your time and not rush with the sharpening. The biggest injuries happen when a sword is getting sharpened.
When sharpening your swords, the best way to prevent injuries is by wearing gloves and planning to work when you aren’t interrupted as much.
Follow these six steps one by one, and you’ll have a sharpened sword at the end of the day.
1. Wipe
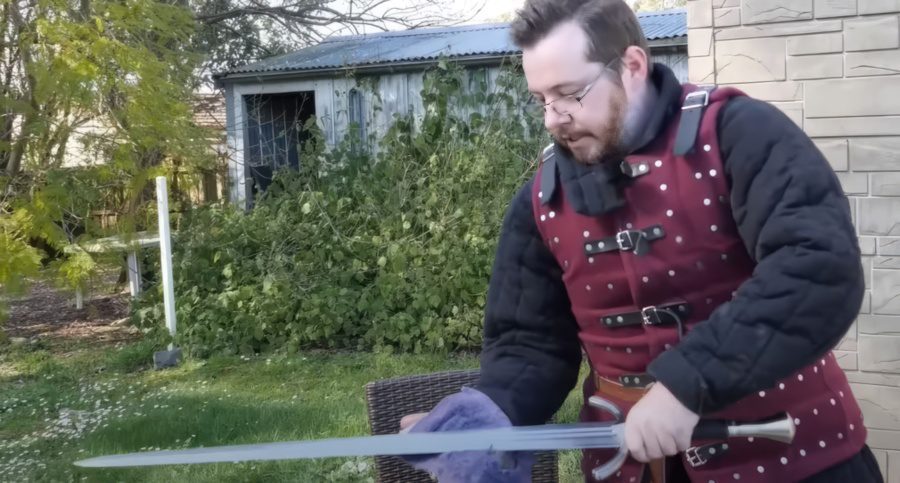
Start by wiping the sword carefully with a thick cloth to remove any oil, dust, or residue that may have built up since the last time you sharpened it. To avoid cutting yourself by accident, move the cloth very gently along the blade without pressing down on it.
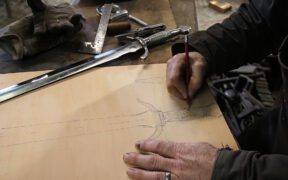
2. File Blunt Edge
Once the blade is clean, put the sword on a table and put a block of wood near the tip to raise the blade. Use a metal file to make even strokes at a 30° angle on one side of the blade. Depending on how long the blade is, you can divide it in half or thirds and work on each part at a time. Make sure to change sides every few strokes to ensure the filing is even.
When an edge starts to show, stop filing. At this point, all you need to do is remove metal until you can see the edge. At this stage, the sword should be very rough and not feel smooth at all.
3. Sharpen & Oil
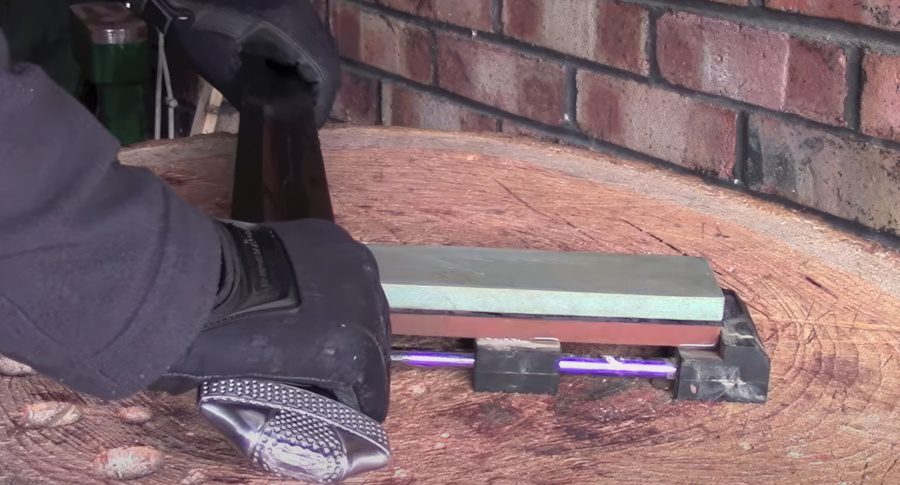
Apply a thin layer of honing oil to the whetstone to keep it from getting too dry and help it sharpen better. If using a Japanese water stone/whetstone, use water instead of oil as a lubricant.
After you’ve oiled the surface of the stone, move the blade back and forth across it at a 30° angle, using smooth, even strokes and the same amount of pressure each time. Wear special gloves to protect your hands when sharpening a sword that is sharp on both sides.
Divide the length of the blade into sections and use the same number of strokes on each side. Flip the blade every few strokes to keep the sharpening process even.
4. Check the Edge if it needs more Sharpening
Check every so often to see if an edge is starting to form. You can also test the blade by wiping off the oil or water and slicing a piece of paper with it. If it tears or rips the paper, it needs to be sharpened more.
5. Blend the Edge
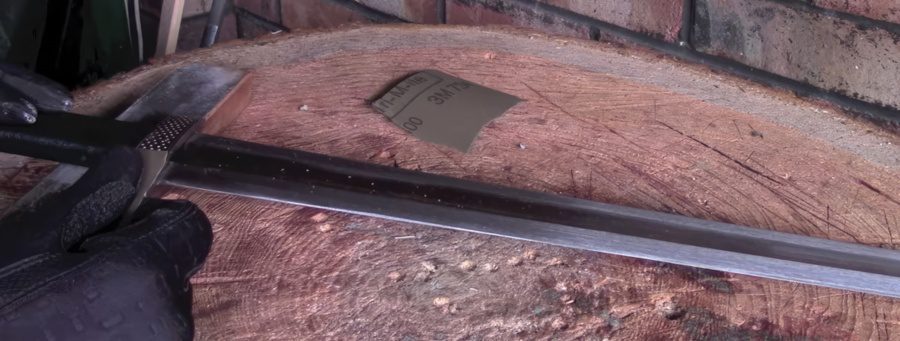
Tear or cut a 2″ x 2″ piece of 400-grit sandpaper. Run it up and down both sides of the blade at a 30-degree angle to blend the edge with the rest of the sword.
6. Wipe
When you’re done, use a damp cloth to wipe the blade clean and get rid of any oil, residue, and metal shavings. Be careful, as rust could form on the blade if you don’t clean it well enough. When you’re done, dry it with a clean cloth.
When & How Often to Sharpen a Sword

Sharpen your sword only when it is really blunt or requires a periodic check-up and servicing. Don’t sharpen your sword when it is already sharpened.
Swords are made of steel, and steel is known to have a kind of expiration date if it isn’t taken care of properly. So, if you want a sword ready for battle, we suggest sharpening it about four times a year (depending on the usage).
Different Methods of Sharpening a Sword

There are a number of ways to sharpen your sword. All of them are effective, so you can choose any of the following methods.
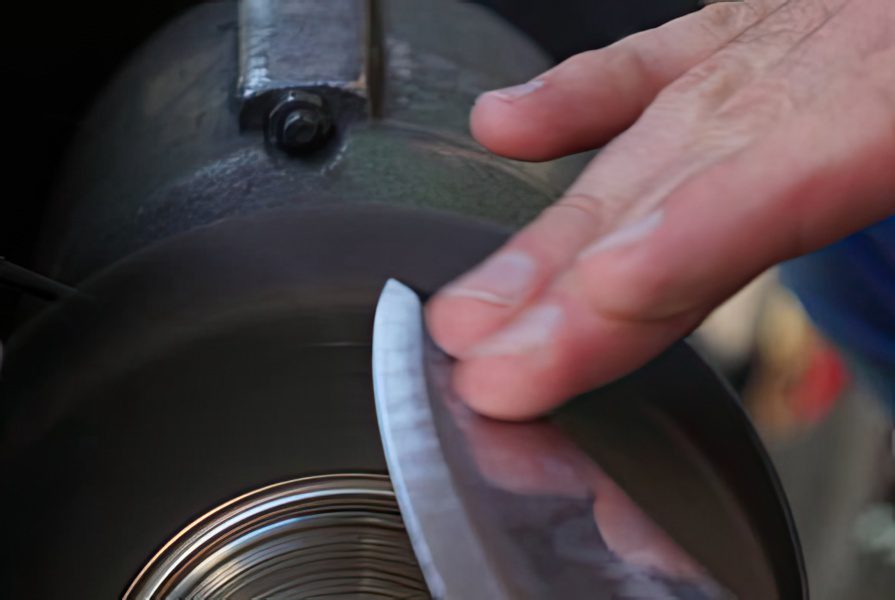
Method 1 – Sanding Belt
This is done with a power tool. The sanding belt will run all the way up and down the machine while you move the blade of the sword along with it. This method is the most universal. It has been used throughout history, from the medieval Katana to the modern LARP steel sword.
Most of the time, you shouldn’t use power tools carelessly because the friction will heat the blade and ruin the temper. But you can use some tools and methods to reduce the chance of tempering interference.
Method 2 – By Hand with File and Whetstone
The file and whetstone method is one of the most basic ways to sharpen a sword. Even though it can take a long time, it is one of the safest ways to get a very good result.
Since it’s all done by hand, it makes sense that you’ll need to practice a bit before you get it right. Sharpening a sword is both an art and a science, so you should practice on a cheap machete, knife, or something similar.
Method 3 – Sharpening Stone with Wood
With just a sharpening stone, some blocks of wood, and a few clamps, you can make a sword sharpening kit at home at an extremely low price. It will give a consistent edge with little work in a short time. It is a very smart and effective way to sharpen your sword.
First, try it out on a cheap sword and see how it goes. It will take time to master this technique, but it is definitely the handiest one.
Method 4 – Power Tools
There are many machines where you just lay down your sword with your blade facing up, and it will get perfectly sharpened.
Then rotate it on the sides, both left and right, and sharpen the sides of the blade. It is the easiest way and doesn’t require any skill at all. That is why some people call it the “cheating” sword-sharpening method.
In general, using power tools to sharpen a sword is not a good idea. Most power tools cause friction, which quickly turns into heat. If you aren’t careful, this heat can rapidly make the sword lose its edge.
Method 5 – Sharpening Service
If you aren’t sure of what you’re doing and don’t want to possibly damage your sword, look up the nearest sharpening service, blacksmith or swordsmith. Sword sharpening can cost around $75 – $100, depending on how much sharpening it needs.
Should you Sharpen a Sword Razor Sharp
Aiming for a razor-sharp sword is never a good idea, especially if you are a beginner. There are a couple of reasons why you shouldn’t make your sword razor-sharp.
- Durability – When your sword is sharpened to a razor’s edge, it will easily slice through things. However, it will stay sharp less and less, and the quality will worsen over time.
- Safety – Some people tend to run their hands across the blade to test it. A beginner might have a razor-sharp samurai sword that could cut into the flesh of their fingers.
A sword CAN be too sharp, even a Japanese sword. Keep that in mind next time you begin sharpening your sword.
Conclusion
There are really an endless number of ways to sharpen a sword. The key is to try as many as possible until you find the one that works best for you. Then, keep on practicing until you can take a sword from completely dull to hair-shaving sharp in the shortest amount of time without damaging the blade or ruining the polish.