Our content features commercial links to our products, committed to transparent, unbiased, and informed editorial recommendations. Learn More
An Effortless Chinese Sword Handle Wrapping Guide
NO AI USED This Article has been written and edited by our team with no help of the AI
If you bought a Chinese sword online and it arrived with a fully unwrapped metal handle instead of a wooden one, and you’re at a loss as to how to make it functional, you’ve come to the right place.
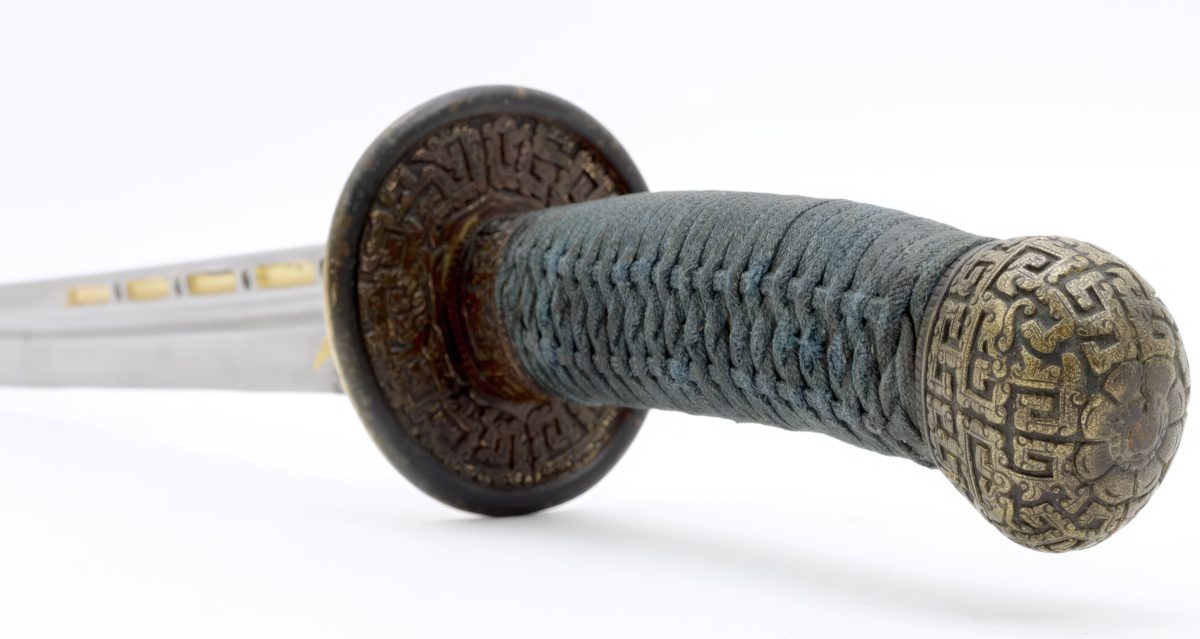
Having a Chinese sword handle wrapped with cords will make it more authentic and historically accurate, and although the task might be a bit cumbersome, it is well worth it. It has been perfected throughout Chinese history dating back to the Han Dynasty. In this guide, we will give you simple instructions on how to wrap your Chinese sword yourself.
Chinese Sword Handle Wrapping Process
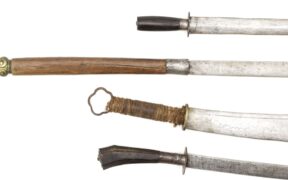
The handle is just one of the many pieces of a Chinese sword. There are different types of Chinese sword handles, and each can be wrapped up differently depending on the style of the sword. That means plenty of Chinese handle wrapping options and variations will give you a better overall grip on your sword.
In this guide, we will show you the easiest and most historical Chinese sword handle wrapping method so that you can become an expert yourself. All you will need is preferably a Chinese sword, but any type of sword will do. You will also need a cord.
Type of Cord
Wrapping a nice grip requires the proper kind of cord. Silk or cotton cords are your best option because a synthetic cord is more prone to sliding. Make sure there is a flat braid on it as well. There has been a notable expansion in the width of sword cords on modern blades compared to ancient Chinese swords.
When properly tightened, a cord of about 0.07 inches (2 millimeters) in width will need around 16 feet (5 meters) of each grip to secure an antique one-handed Chinese sword. Contemporary Chinese swords’ larger or thicker handles, such as the Miaodao, require slightly more than the 16-foot (5-meter) minimum.
A natural cotton cord is another great choice, but it can be more pricey per meter than synthetic alternatives. Blue, brown, green, black, and even natural ivory are just some colors that can be dyed or special-ordered.
Preparation Phase
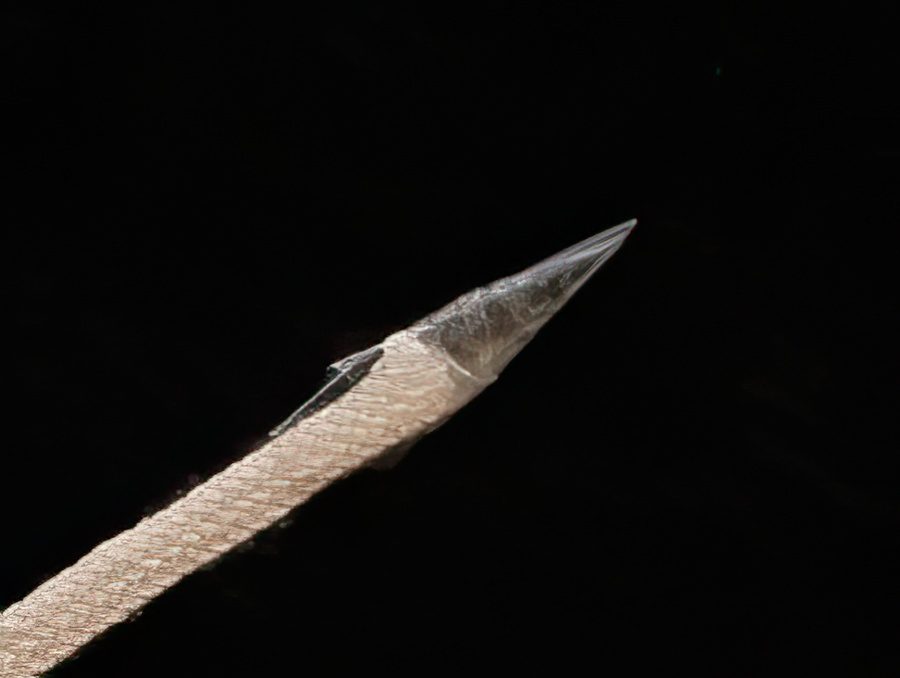
Before you start the Chinese handle wrapping, a very good tip would be to tape the ends of the cords, both the beginning and the ending side. Make sure that a rigid and sharp tip appears because you’ll have a much easier time working with it. Using any type of lightweight duct tape will also work for this step.
Layout
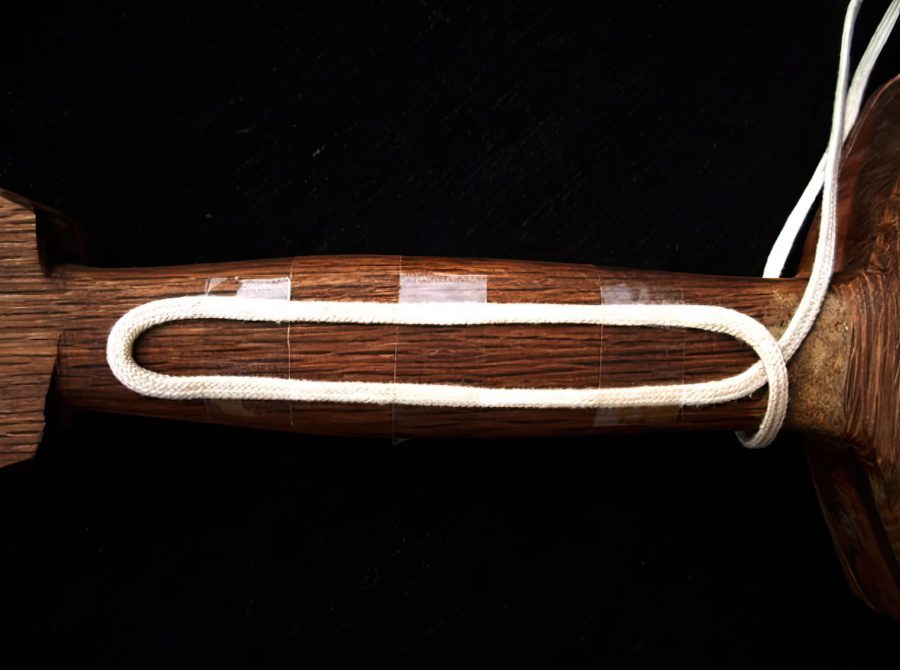
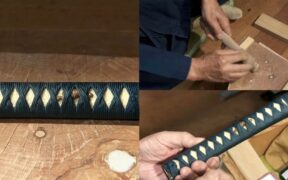
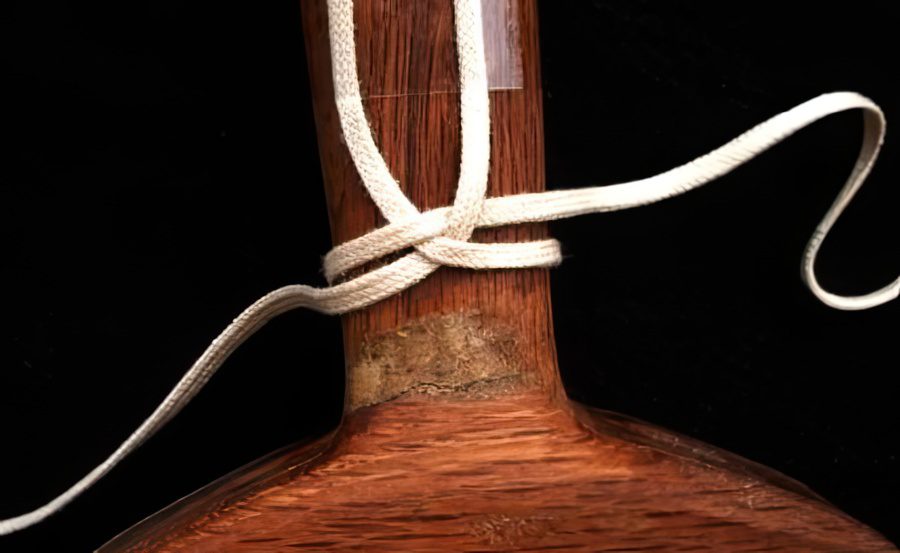
- Begin by placing two sets of cords on each side of the Chinese sword handle in a semi-circle position. Start in the middle of the cord and place a loop at the pommel side. You can place the loop as you want it to appear in the final result, but slightly longer. The loop is going to strengthen as you add more cords.
- Tape the inner cords to the handle to make it stronger. You can also tie the cord on guard or let them cross over each other. It works either way. Once you’ve done so, one side of the cord goes to the right and one to the left. Having the same length and width for both cords (hanging on the sides) is important. If the length is not the same, and one is longer or shorter, you must redo the whole wrapping procedure. Overlap them as shown in the pictures while tightening them with tape. When you’re sure the dimensions are correct, you can begin the actual wrapping.
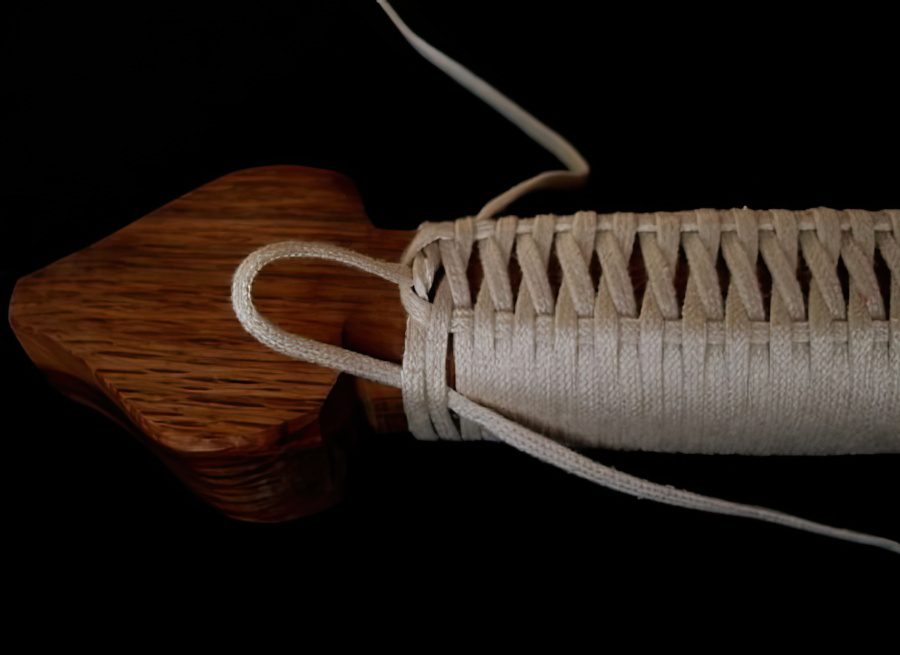
Wrapping

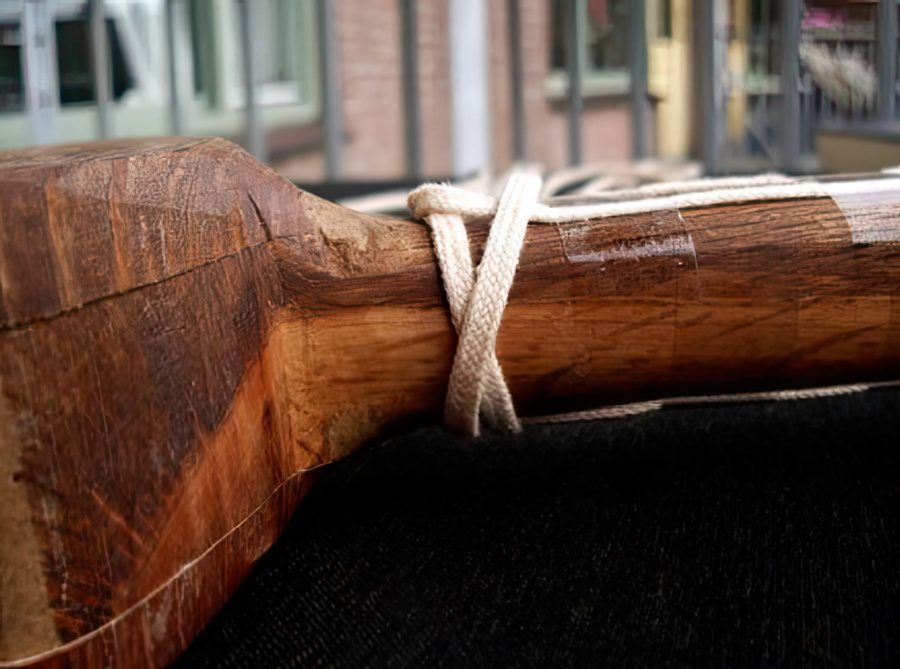
When you have the cords overlapping, you will start with one side and place it through the loop of the other side. Keep in mind that when the cord goes around, it will need to cross the other side of the handle, so moving the handle along with the cord is a good idea. But this is the only time you have to worry about this issue.
On the starting side of the handle, you will see your first wrapping pattern. Proceed to move the cord to the other side, and always pay attention to which cords have passed over or under the inner loop. Once you’ve got the hang of the first one, you will do the same thing with the opposite cord.
Now you will begin to tie the wraps snugly together, so it’s a good idea to hold it in place with your fingers while finishing the next wrap. Tie it as tight as you can. When you finish tying up, turn the handle again and repeat the same process. Just make sure they all lie straight and flat on the sword handle so they don’t get twisted.
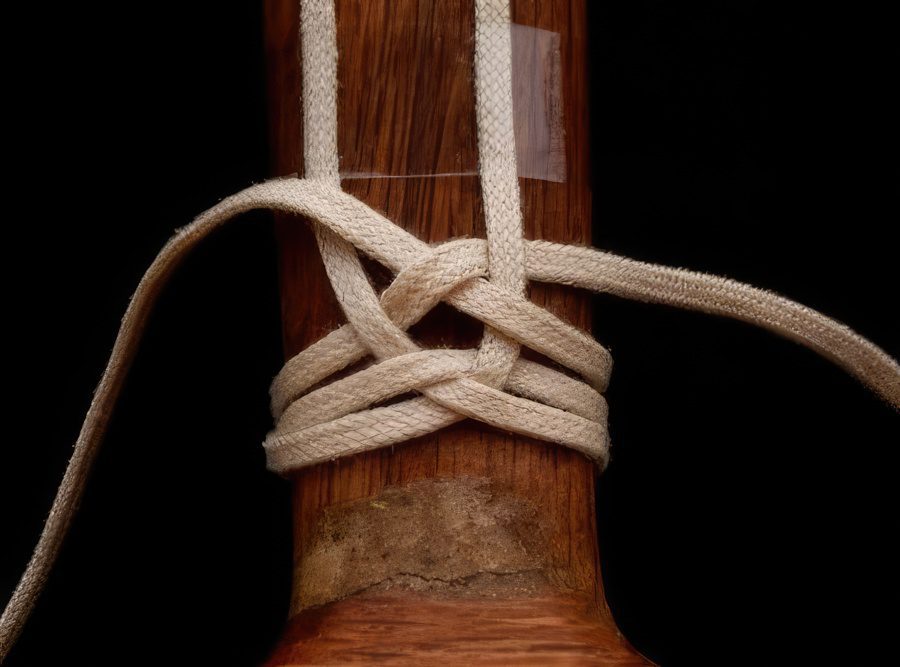
Continue creating these wraps repeatedly, and keep them as tight as possible, as stated before. Watch for the corrected inner loop each time you finish an individual wrap. After a while, you should see patterns like those shown in the picture above.
End Phase
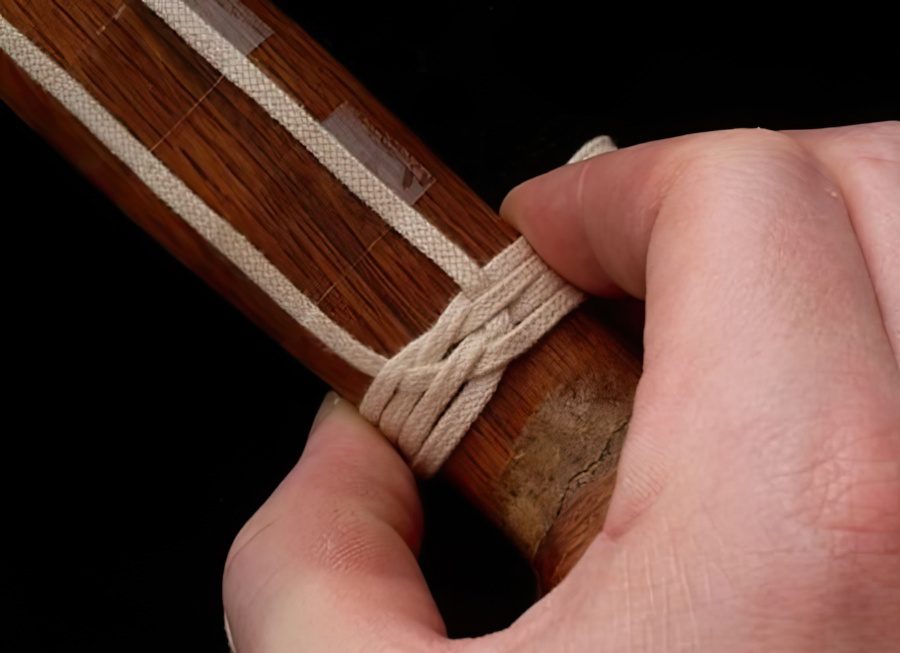
- Once you have done all the wraps successfully, you need to tuck the last cord under the previous wrappings you’ve made. For this to be possible, you are going to tie up the last couple of patterns much lighter than the rest, and then once you’ve placed the last cord, you can pull on it and tighten all the wrappings together.
- When you’ve pulled on this last cord, and everything is as tight as possible, double-check the patterns and strength of the cords, and only when you are sure, cut both ends of the cord. And just like that, you’ve got a beautiful Chinese sword handle all wrapped up!